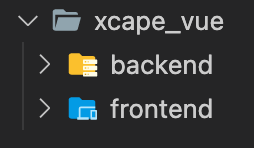
프로젝트 구조는 backend, frontend를 나눠서 진행했습니다.
터미널로 backend 디렉토리에 접근한 뒤 mysql을 설치합니다.
npm install mysql --save
backend/config/database.js
const mysql = require("mysql");

const db_info = {
  host: "DB HOST",
  port: "PORT_NUMBER",
  user: "USER_NAME",
  password: "PASSWORD",
  database: "DATABASE",
};

module.exports = {
  init: function () {
//	    return mysql.createConnection(db_info);
	return mysql.createPool(db_info);
  },
  connect: function (conn) {
    conn.connect(function (err) {
      if (err) console.error("mysql connection error : " + err);
      else console.log("mysql is connected successfully!");
    });
  },
};
파일을 만들어줍니다.
DB연동 방식엔 createConnection()방식과 createPool()방식이 있습니다.

createConnection()의 경우 단일연결방식으로 요청이 생길때마다 처리하는 것으로 요청이 많아지면 서버의 부하가 심해집니다.
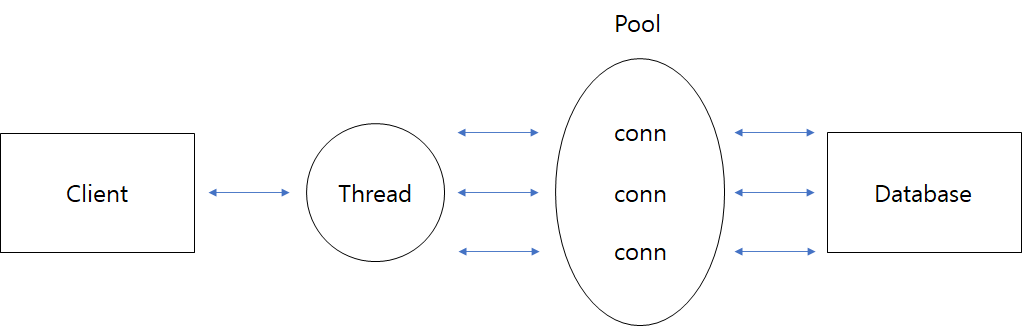
createPool()방식은 연결할 수 있는 connection 갯수를 정해 만들고 요청을 할 때 connection을 가지고 있어야만 데이터를 요청할 수 있습니다. 데이터 요청을 끝내면 release()를 해주어 connection을 반납해줘야합니다.
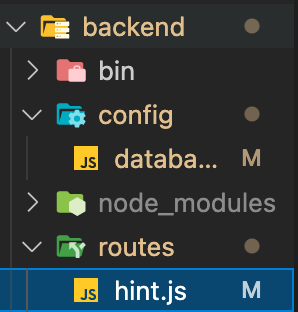
backend/routes/hint.js 파일을 만들어 쿼리를 사용해 데이터를 조회 해보겠습니다.
const express = require("express");
const router = express.Router();
const db_config = require("../config/database.js");
const pool = db_config.init();

/**
 *  가맹점을 불러오는 쿼리
 */
router.get("/merchant/list", function (req, res) {
  pool.getConnection((err, conn) => {
    if (err) throw err;
    else {
      let sql = "SELECT merchant_code, merchant_name FROM merchant;";
      conn.query(sql, (err, rows, fields) => {
        if (err) throw err;
        else res.send(rows);
      });
    }
    conn.release();
  });
});
backend/app.js
var createError = require("http-errors");
var express = require("express");
var path = require("path");
var cookieParser = require("cookie-parser");
var logger = require("morgan");

var hintRouter = require("./routes/hint");

var app = express();

...

app.use("/api", hintRouter);
app.js에 /api라고 hintRouter을 정의 해줬기 때문에 요청은 http://localhost:3000/api/merchant/list의 주소를 사용해야 합니다.
앞서 말한 것처럼 데이터 조회가 끝나면 release()로 connection을 반납해야 합니다.
<b-input-group size="md" prepend="가맹점">
	<b-form-select id="merchant" @change="getThemeList()" v-model="defaultMerchantCode">
		<option v-for="(data, index) in merchantList" :key="index" :value="data.merchant_code">
			{{ data.merchant_name }}
		</option>
	</b-form-select>
</b-input-group>

...

<script>
export default {
	created: function () {
    this.getMerchantList();

    // this.$http
    //   .get("/api/merchant/list")
    //   .then((res) => {
    //     this.merchantList = res.data;
    //   })
    //   .then(() => {
    //     this.getThemeList();
    //   })
    //   .catch((err) => {
    //     console.error(err);
    //   });
  },
  data() {
  	return {
    	merchantList: [],
        defaultMerchantCode: "MRC001"
    }
  },
  methods: {
  	getMerchantList(): {
    	function{...}
    },
    getThemeList(): {
    	function{...}
    }
  }

  ...


}
</script>
(vue-bootstrap이라 태그가 이상하게 보이지만 <select><option>으로 바꿔도 문제없이 작동합니다.)
methods 영역에 주석처리한 내용을 getMerchantList()라는 이름으로 담았습니다. this.$http의 의미는 axios를 뜻 하는것이고 get으로 http://localhost:3000/api/merchant/list 로 요청을 보냈습니다. 성공한다면 data()내에 정의 돼있는 merchantList에 바인딩하고 vue option에 맵핑해서 반복문으로 option태그를 만듭니다.
[
	{
    "merchant_code":"MRC001",
    "merchant_name":"강남-엑스케이프"
    },
    {
    "merchant_code":"MRC002",
    "merchant_name":"건대-엑스케이프"
    },
    {
    "merchant_code":"MRC003",
    "merchant_name":"건대-엑스크라임"
    },
    {
    "merchant_code":"MRC004",
    "merchant_name":"수원-엑스케이프"
    }
]
말이 좀 헷갈리는데 :value에는 해당 option의 key값이라 생각하시면 됩니다.. (제가 말을 잘 못하는걸지도...ㅠㅠㅠ)
<option>태그 사이에 {{ 반복문의데이터.가져온데이터이름 }} 으로 맵핑하면 됩니다.

데이터는 받아왔으나 select 박스는 비어 있을겁니다. 그럴땐 <select>태그안에 v-model을 사용해서 default value 을 설정해야 하는데 첫 번째 데이터가 바인딩되는 것을 원하기 때문에 data() 내에 defaultMerchantCode: "MRC001"로 해주면 됩니다.
createPool()로 커넥션을 만들어 데이터베이스와 연동하고 어떻게 사용하고 select태그와 option태그에 어떻게 바인딩하고 맵핑하는지 또 default value를 어떻게 설정했는지 봤는데 뷰에서 디자인적인 요소를 만드는 것 보다 디비연동을 어떤 방식으로 짜야하는지와 같은 구조적인 부분에 시간을 더 들였습니다. ~ in ~ 형식의 반복문도 처음 접했고 이 반복문을 쓸 때 :key라는 것을 꼭 써줘야 하더라구요.
일단 임시적으로 frontend/src/component/HelloWorld.vue에 작성했는데 component, views 폴더마다 쓰는 뷰들의 역할이 다른 것 같아서 이 부분은 조금 더 찾아보고 제대로 작성하겠습니다!
'Xcape Project' 카테고리의 다른 글
| Vue 프로젝트 근데 이제 express와 node.js를 곁들인... (1) | 2022.01.01 |
|---|---|
| 🔥구글 플레이스토어에 앱 올리다.🔥 (1) | 2021.08.25 |